 Crown
MoldingCrown
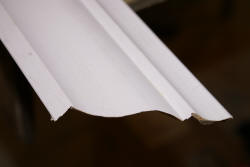
Molding is a trim detail applied to the top of a wall at
the intersection of the ceiling. It can be one single
molding or several put together giving a deep ornate
feeling.
Crown is a classification of moldings
that cover an infinite number of styles and forms.
All with the same function of terminating a wall into a
ceiling.
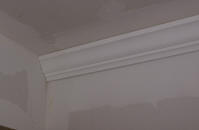
Crown molding should complement the
room and style of the house. Colonial style molding in a
Victorian home looks out of place and can be distracting.
There are pattern books available for every motif. These
books can help guide you to the right style for your home.
Choose the crown carefully.
Large crown in a room with low ceilings can make it seam
smaller and squat. Small crown in a large room
will get lost.
 Tague
lumber has one of the areas best selections of moldings
and samples of crown moldings.

Installing crown molding
If you have never used a Miter saw
please have a professional show you and refer to our
page on its use "Miter saw"
There are two
different angles that crown is install, refured to as
"spring angle". The most common is 38 degrees.
the other is 45 degrees. It is important to know
the angle of your molding before you cut. Crown can be
cut "in place" or "on the flat".
In Place (movie
crowninplacefin- The crown is cut on the saw with
the bottom on the molding against the fence of the saw
and the top of the crown on the bed of the saw. It
is important that it is sitting at the correct angle and
each piece is set in the saw the exact same way.
On the Flat (movie here) -
The crown is cut with the molding lying flat on the bed
of the saw. The miter and bevel of the saw are set
a the proper angle to cut the compound angle (this is a
two dimensional angle sloped both vertically and
horizontally.) for 38 degree crown the settings
for a 90 degree corner is 31.6 for the miter and 33.8
for the bevel. Most saws have these points marked
on their bed.
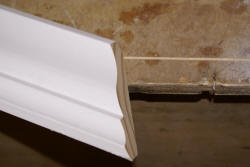
Laying
out the Room
Determine how
far down from the ceiling on the wall your crown
extends. You can do this by cutting a small piece
and setting it on the wall.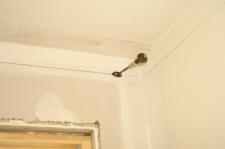 Mark this
measurement at each corner of the room and several
locations on longer walls. Using a chalk
line strike lines around the room. This will
ensure that the crown installs straight and at the
proper angle. Start by
installing the crown on the longest wall. (I do this
incase I make a wrong cut, I can always the the miss cut
piece on a shorter wall.) This first piece will run full
length. don't bother to cut angles on the corners.
the pieces that ajoin will be coped.
 Determine
the main veiling point of the room. This is the
area most used. It could be the main door way, a
sitting area, in a kitchen it could be the island.
From this point you want all your joints and splices
going away from. This will help hide them. The wall that
you will most often be facing from this point is the
main wall. This should have the fewest number of
joints and run full length with the adjoining
crown copped. Determine
the main veiling point of the room. This is the
area most used. It could be the main door way, a
sitting area, in a kitchen it could be the island.
From this point you want all your joints and splices
going away from. This will help hide them. The wall that
you will most often be facing from this point is the
main wall. This should have the fewest number of
joints and run full length with the adjoining
crown copped.
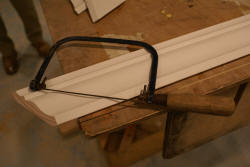
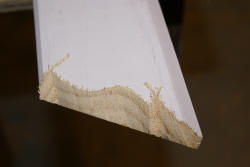
Copping
 Movie
here. First cut an
inside miter on the crown for a normal wall this will be
a 45. This can be done by cutting in place or on
the flat. Movie
here. First cut an
inside miter on the crown for a normal wall this will be
a 45. This can be done by cutting in place or on
the flat. When measuring
the wall, I like to add 1/16 to my cut length. The
molding "springs" into place on the wall making a tight
joint. This also helps prevent the joins from
shrinking and opening.
Outside Corner
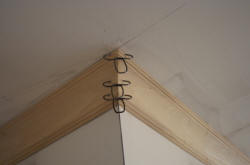 This
is the easiest joint to cut and the hardest to make look
good. This
is the easiest joint to cut and the hardest to make look
good. The cut is a
simple 45 for most walls. Don't nail
anywhere near the corner until the alignment is right.
By letting the corner float you can adjust the angle of
the moldings. Use quick
setting glue and clamp the joint with spring clamps.
|


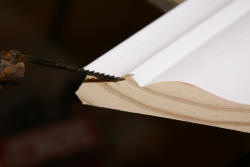 With
your coping saw cut along the line formed by the miter
cut and the face of the crown. Be sure to cut at a
steep back angle.
With
your coping saw cut along the line formed by the miter
cut and the face of the crown. Be sure to cut at a
steep back angle.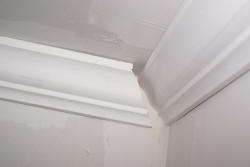 With
the the molding coped, put it against the wall and pop
it into place.
With
the the molding coped, put it against the wall and pop
it into place.